

Posted by Eileen Foley on 10th Nov 2021
Autumn Lantern Tutorial
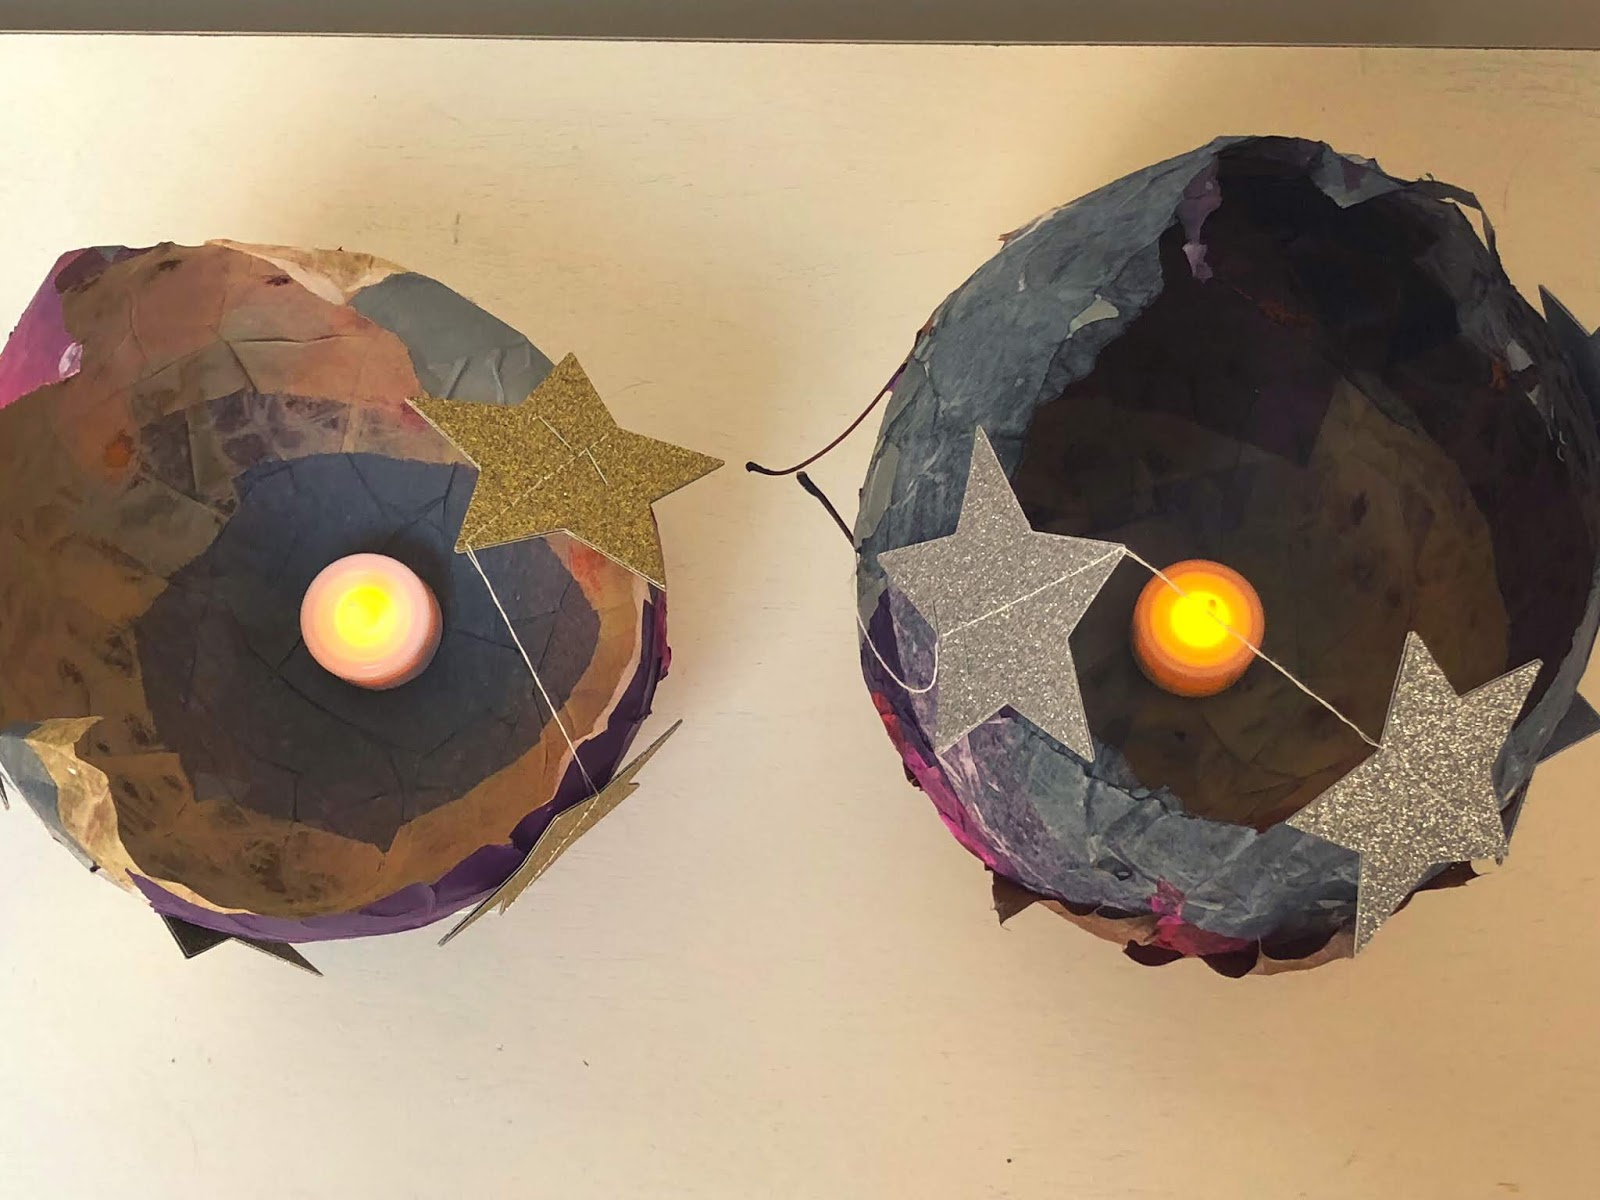
As promised to my Facebook and IG community, here is the tutorial for these very pretty Autumn Lanterns that we made at our home for Martinmas. These are very fun to make and come out so beautiful. We also did these in our New England Lifeways training and each and every student's lantern came out so unique.
Supplies Needed:
Different Colored Tissue Paper
Balloons
Old Paint Brushes
Glue
Jar
Water
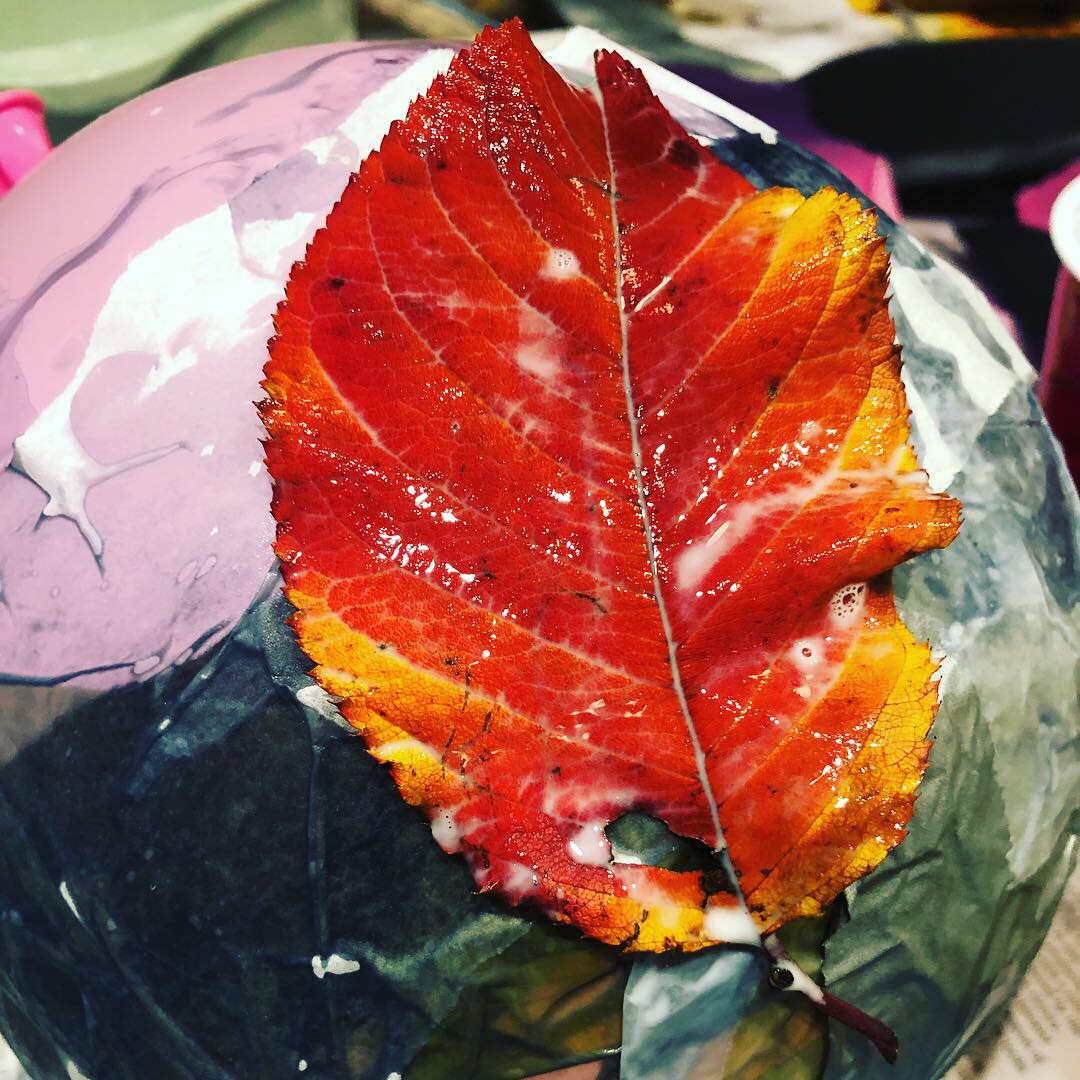
Leaves (optional)
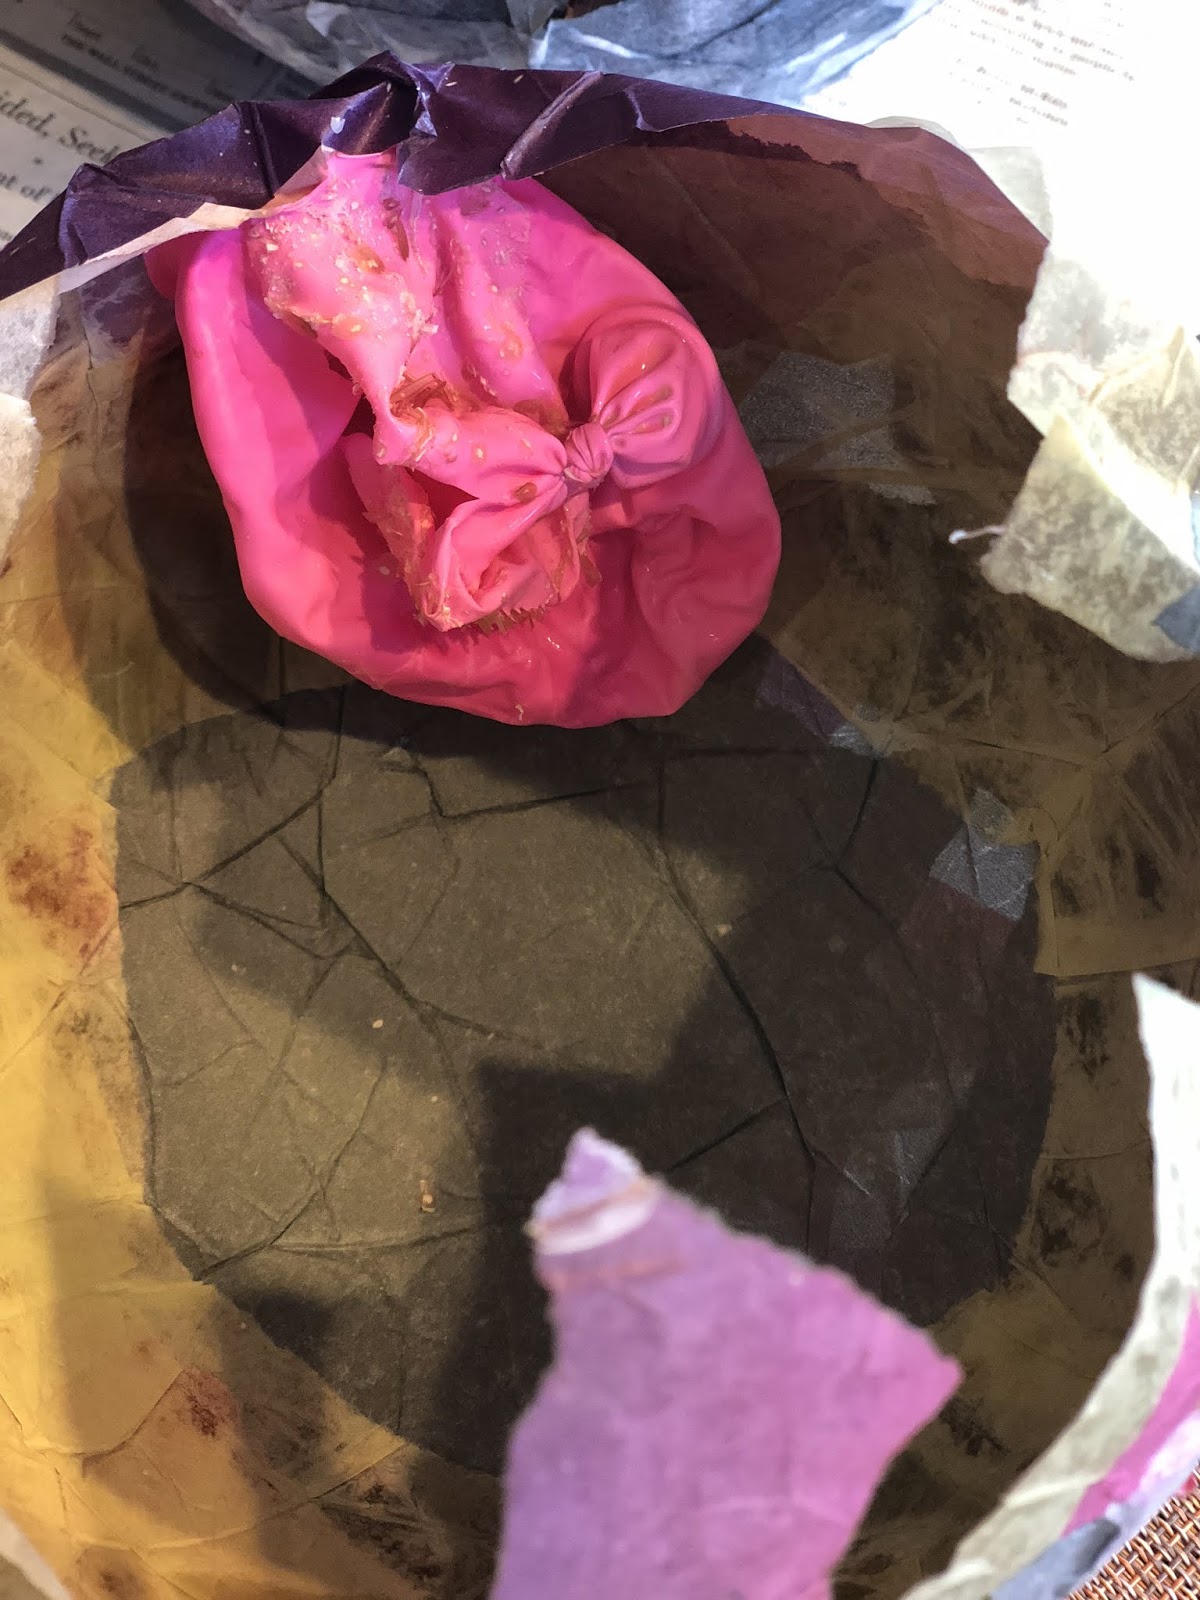
Blow up balloon and tie.
Place balloon in a bowl or on top of a wide mug, jar or cup to work.
Mix glue with 1 part water in a separate container.
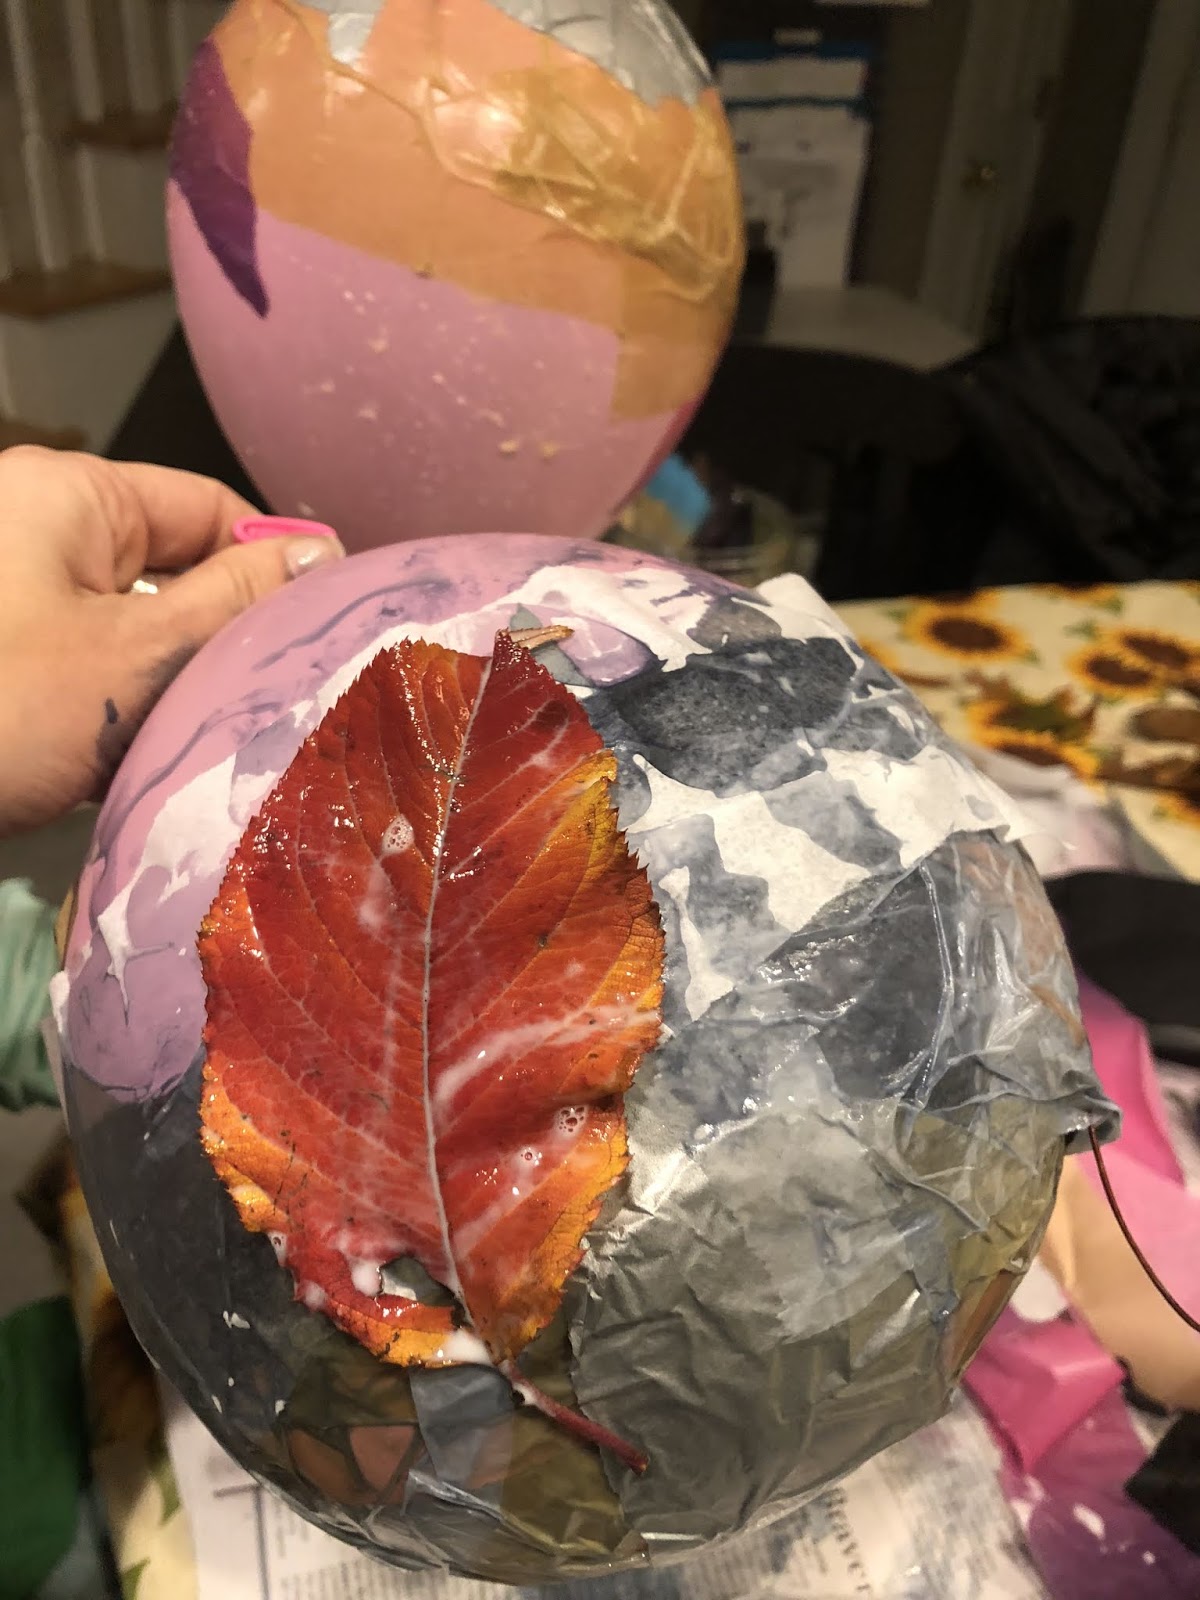
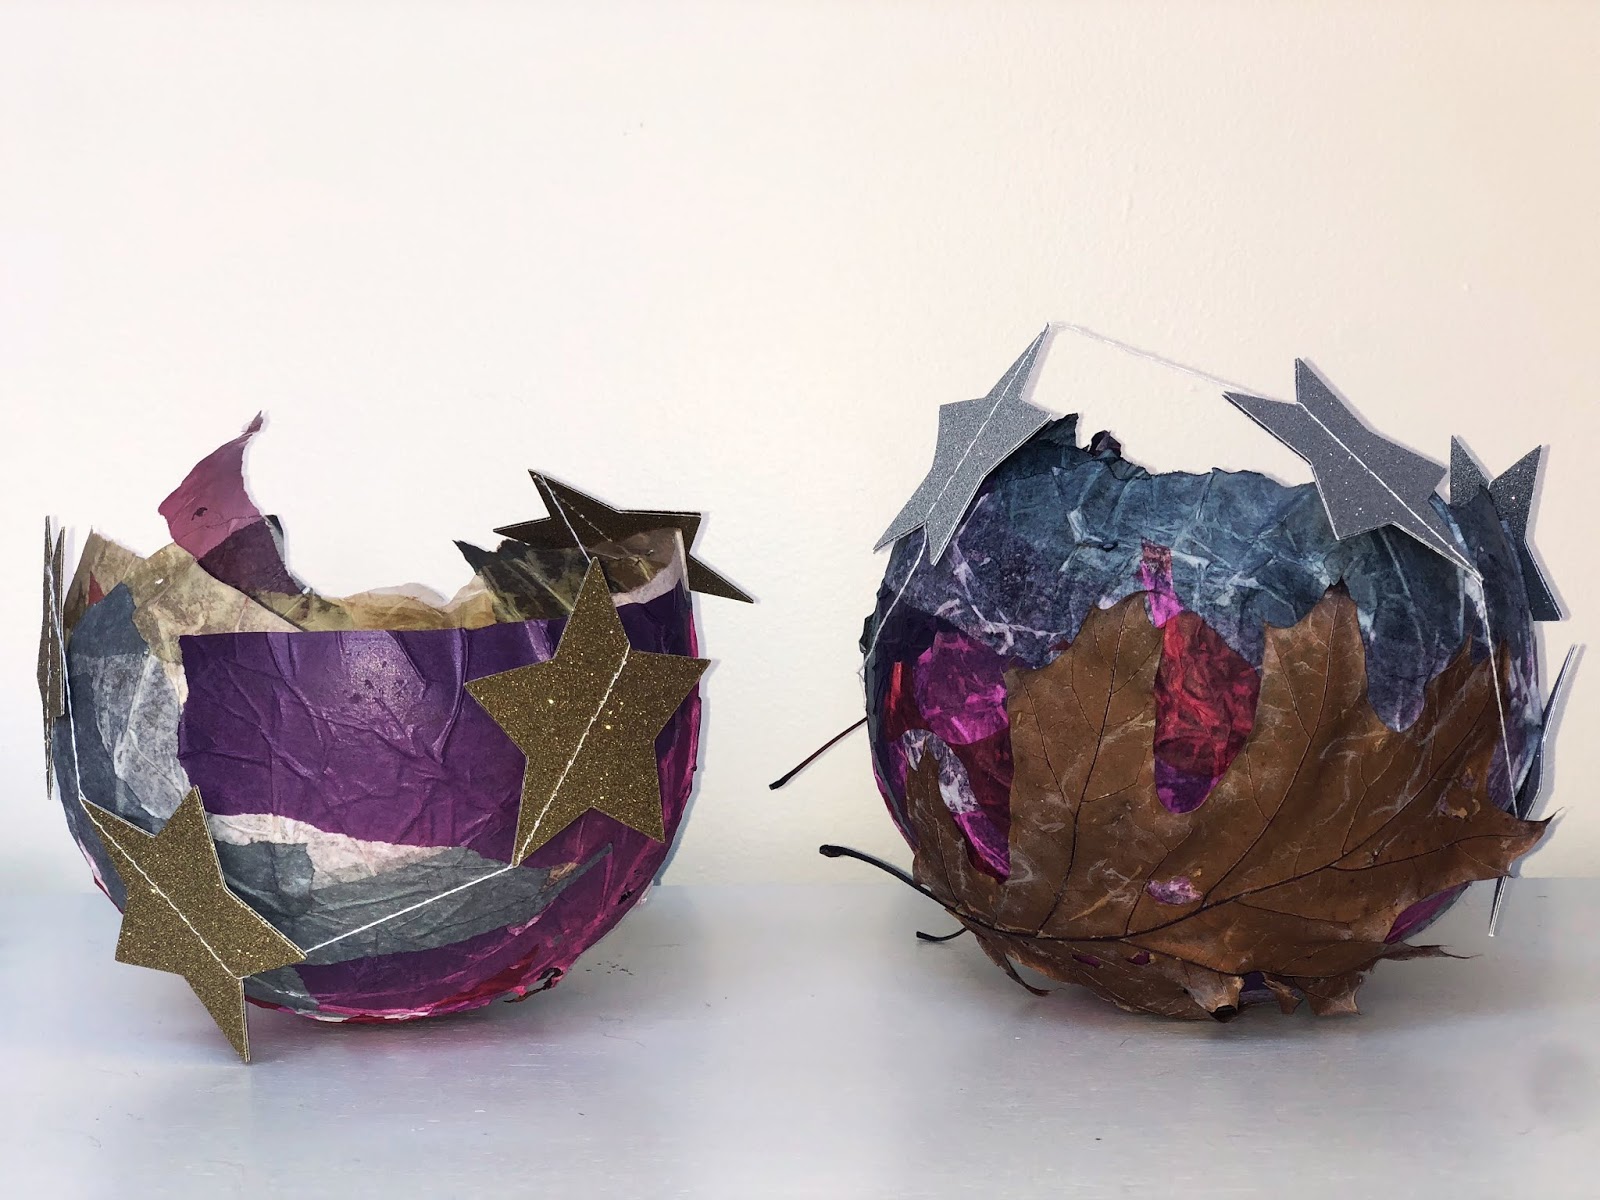
Working carefully, paint glue mixture onto individual strips and pieces of tissue paper. You will be covering only half of your balloon, leaving the top half with knot open to make a bowl shaped lantern. Be sure to glue the underside of each strip of tissue as well as the top and keep layering and layering until you have a nice design that will be thick enough to stand firm after drying.
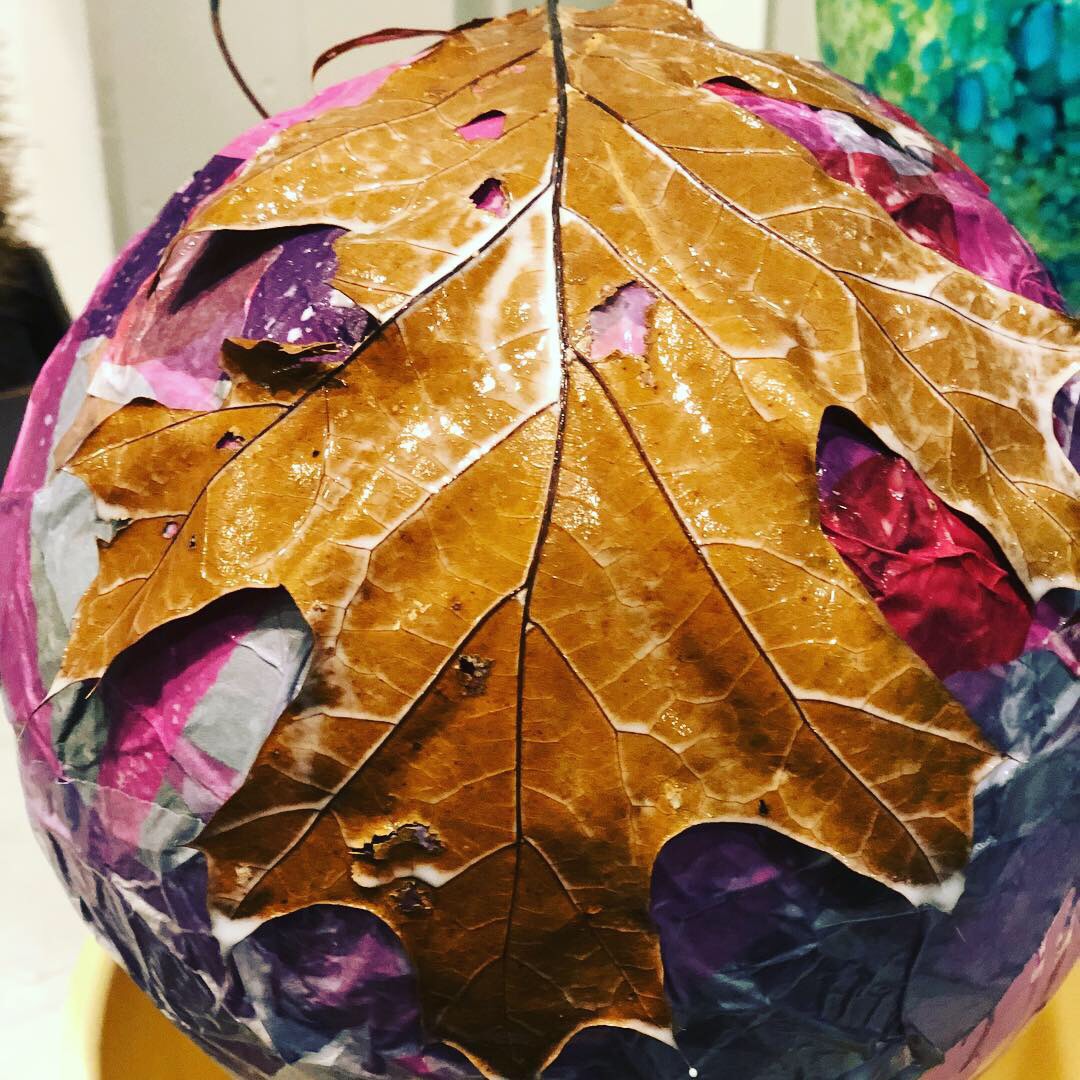
Experiment with different designs, transparency ideas or even consider gluing autumn leaves to your lantern.
When completed, place your wet balloon lantern on top of the same cup or bowl to dry overnight. In the morning pop your balloon and carefully pull out and away from your lantern.
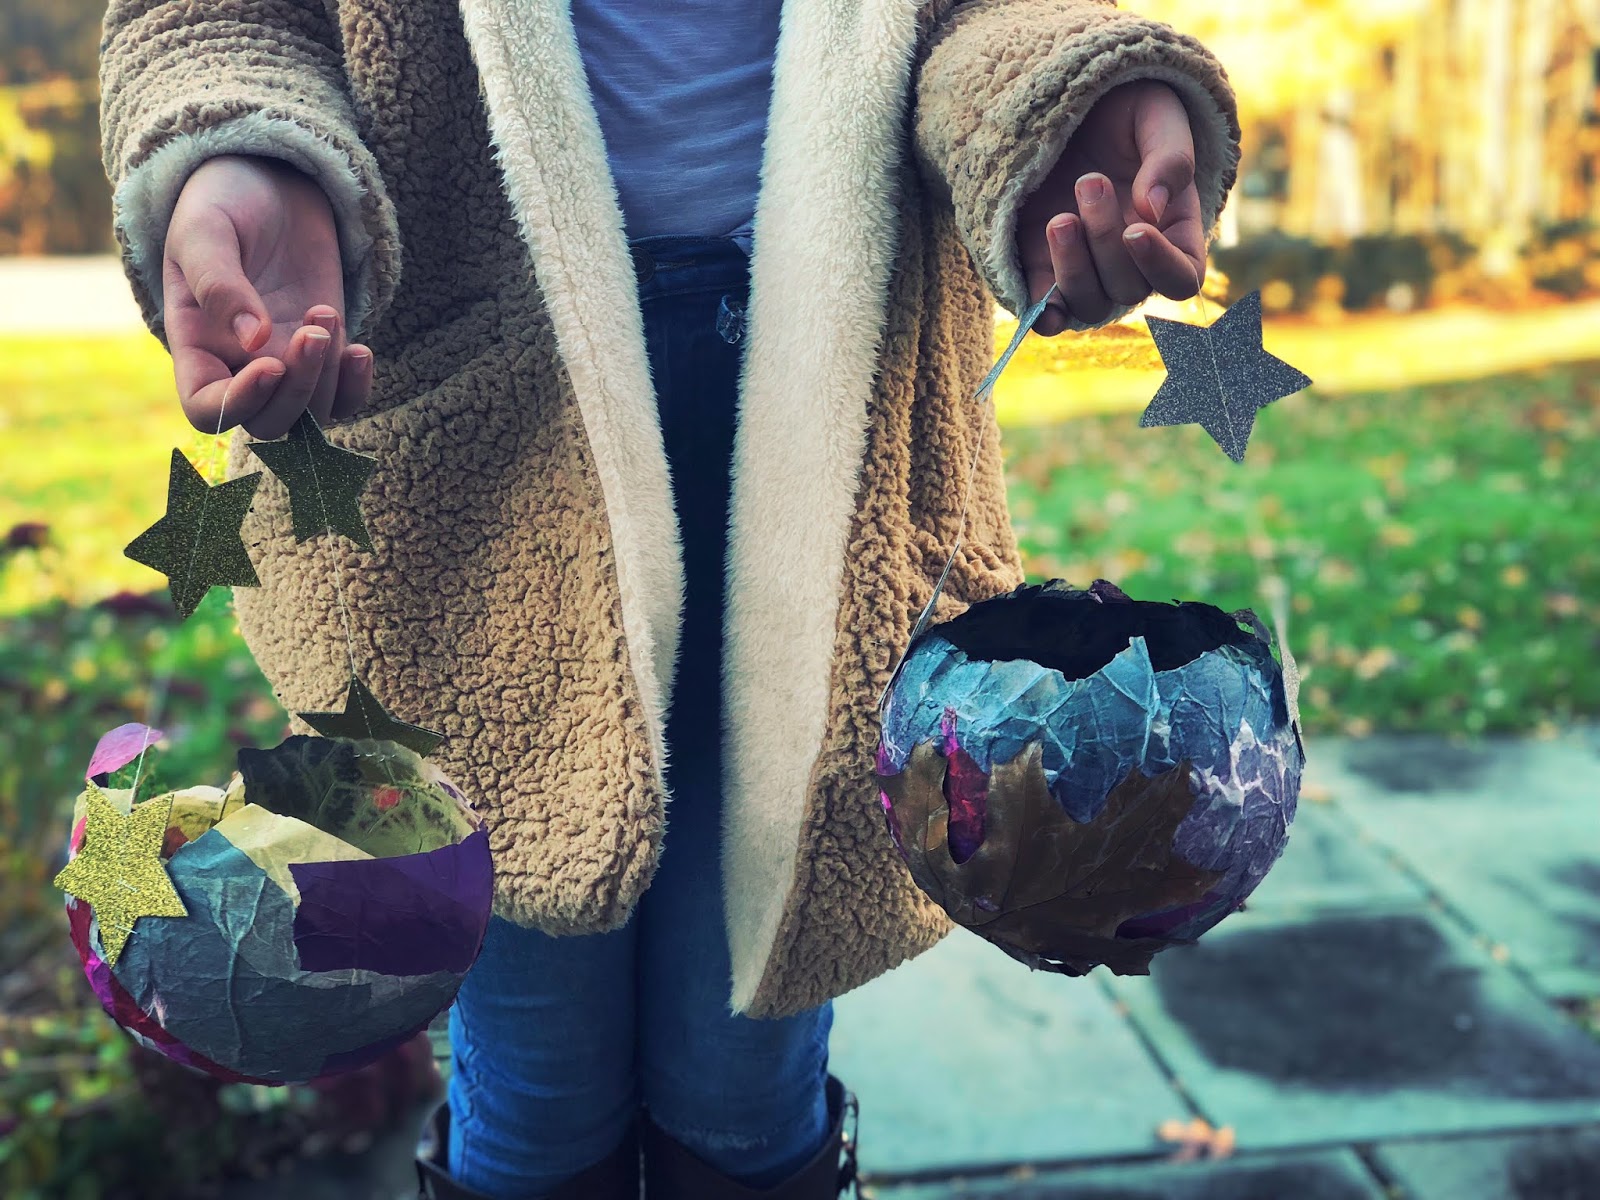
We stapled star string for a handle. You can also punch holes on either side and tie with string or make a handle out of wire. If you decide to use real candles, please be very careful as the tissue paper can catch on fire. We chose to use battery operated votives and it was just perfect.
Tag us on Instagram @littleacornlearning to show us your lanterns!
If you like this activity, be sure to check out our other publications for more inspiration.
Enjoy!